Groups will initially show as "Counting" while this process takes place, and will display their respective counts as the tallies come in from the database.


Then, Kim, Joe, and Susie would each see that their own representatives were copied on the messages as well -- also a good reminder of that direct contact information should the recipients have any questions.
Note: When using the CC feature, JangoMail is generating two emails for every one recipient address. This will double your email sending volume for pricing purposes. If you use this feature along with our BCC feature, then you will be tripling your volume for pricing purposes.


Check Job/Campaign Status
Once you send, your campaign goes through three stages:
These states are shown in the JangoMail interface under Reporting, and you can now confirm the current status of any campaign by API as well.
GetMassEmailStatus returns the current status for the given job/campaign ("Preprocessing", "Sending", or "Complete").
Enhancements to the "Send..." Methods
The CustomCampaignID can now be specified in the "Options" parameter of the "Send" methods (SendMassEmail, SendMassEmailPrevious, SendMassEmailPrevious2, SendMassEmailRaw). For example, Options can now include the following parameter: CustomCampaignID=FinalMailer.
Attachments will now validate during sending. This will alert you if you specify an attachment in the "Options" parameter that does not exist on the server. Previously, such a campaign would still go through, but missing the attachment, and the method would return a SUCCESS message. Now if the attachment doesn't exist, an exception will be thrown and no campaign will be sent or saved.
Enhancements to AddGroupMember and EditGroupMemberFor the full web-based reference on all available methods and their signatures, including the new methods and enhancements, click here.


This notice applies to you if you use JangoMail's "Connect to Internet Web Site Database" feature to pull email address data in real-time from your web site's database.
We've updated the web server script file that is used to allow JangoMail to connect to your web / database platform. This update applies to those customers using one of these three platforms:
This update does not apply to the PHP / MySQL platform, because the w_4.php file has never used the EnDeCrypt algorithm used in the w_x.asp files.
What is the update?
The update eliminates the EnDeCrypt encryption algorithm that was previously used in the w_x.asp files. The EnDeCrypt algorithm present in the w_x.asp files is an outdated encryption/decryption mechanism that we have deprecated in favor of using standard SSL (Secure Sockets Layer) security with the https protocol.
If you retrieve the appropriate w_x.asp file now from the Extract From My Database tab of JangoMail, the new w_x.asp file will no longer contain the lines of code that perform the decryption. If you have made your own custom modifications to the script file on your web server, you can update the file manually. Or, you can retrieve the updated file from JangoMail directly.
After the updated file is in place, you must click a button at the top of the Extract From My Database tab which will tell JangoMail to stop encrypting data using the EnDeCrypt algorithm when passing information to your web server.
To update your w_x.asp file manually:
To retrieve the updated w_x.asp file from JangoMail:
Do I have to update my w_x.asp file?
We highly recommend that you do the update as soon as possible. The old versions of w_x.asp, with the EnDeCrypt mechanism, will continue to work through the end of the year. In early 2009, the option to use a w_x.asp file with the EnDeCrypt routines will no longer exist.
One final note:
There is a benefit to updating if you maintain multiple JangoMail accounts. The old w_x.asp files, with the EnDeCrypt mechanism, made use of a private key that was hard coded inside the routines, and a private key was unique to a single JangoMail account. Once you update to the new w_x.asp files, there will be no hard coded key, and this will allow the same version of the w_x.asp file to be used with multiple JangoMail accounts.

This multiple connection only works one direction, however. You currently CANNOT have multiple JangoMail accounts linked to the same Salesforce account. A Salesforce account can only be linked to one JangoMail account, but a JangoMail account can be linked to multiple Salesforce accounts.


This feature is most often used when exported data needs to be synchronized locally to other stored data. In the example above, we could then update Jane's information easily because we had her customerID -- and that is how our system tracks her.
Robert Fischer is the creator of OffstageArts, an open source integrated arts management system (http://offstagearts.org). OffstageArts is written in Java and deployed via Java WebStart. Mr. Fischer has graciously provided notes on his solution for us to post so others can follow in his footsteps. Many thanks to Robert for sharing his work with us!
Using JangoMail with Java
The most convenient way to use JangoMail with Java is to use Java-based SOAP tools. Apache Axis (http://ws.apache.org/axis/) is available as a commponly used Java SOAP system. Although these tools can be intimidating at first, they make life much easier over the long run. Moreover, using them does not require much effort, just follow the steps below.
Axis is able to download the JangoMail WSDL web service description file and generate a set of JangoMail Java stub classes from it. You can then compile those classes and use them in your application. The JangoMail SOAP stub classes (generated by Axis) insulate you from the complexities of SOAP XML. An example of using these classes:
-------------------------------------------
// Make a service
JangoMail service = new JangoMailLocator();
// Now use the service to get a stub which implements the SDI.
String usr = "JangoMailUserName";
String pwd = "JangoMailPassword";
JangoMailSoap soap = service.getJangoMailSoap(new URL(https://api.jangomail.com/api.asmx));
soap.addGroup(usr, pwd, "TestGroup");
-----------------------------------------------
Doing It -- Automated
The easiest way to go through this process is to use the enclosed Netbeans/Maven project. For this, you will need NetBeans with the Maven Plug-in. If you do not have that, it can be obtained at: http://netbeans.org/ and then by following directions at: http://mevenide.codehaus.org/m2-site/mevenide2-netbeans/installation.html
With NetBeans+Maven, you are now ready to go:
This procedure has now produced a file "jangomail-1.0-LATEST.jar" that you can use in other projects. If your other projects are Maven- based, you can use the dependency:
groupId = com.jangomail
artifactId = jangomail
version = 1.0-LATEST
When the JangoMail API changes, you must re-run this procedure to make the updates available to your application.
Doing It -- Manual
If you do not have NetBeans + Maven, then you will need to download Axis and run it manually:


Want to know what you've sent to a particular recipient recently? Have they opened or clicked links in your messages?
With our new Historical Tracking feature, you can now see your activity history for an individual address stored in a JangoMail Group.
To pull up the history go to Groups and E-mail Addresses and select your Group. Within the Group, select the desired address to display that subscriber's details in the right hand panel. At the top of the details screen, click to View historical tracking information for this person.

The detailed report will display to show you the 30 day history. You can use the dropdown to go back 60 and even 90 days for the recipient.


If box is unchecked:
http://www.browniekitchen.com/WelcomeVisitor.html
If box is checked:
http://www.browniekitchen.com/WelcomeVisitor.html?
MassEmailID=24343243&email_id=98434&emailaddress
=john@doe.com&FirstName=John&LastName=Smith&
submission_date=1/1/08&confirmed=True
Therefore, checking the box allows you to program your web page to display a personalized message to the recipient based on the variables in the URL.


%%Subject%% (subject of your e-mail campaign)
%%CampaignID%% (numeric identifier for your campaign)
%%EmailAddress%% (recipient e-mail address)

It's here! Login to your account, go to Reporting, and then click the link to try our new Super Reporting (Beta) and get these enhancements:
Note: You can always switch back to the "Classic Reporting" interface.
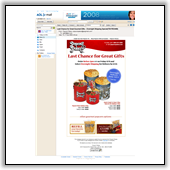 AOL Mail | 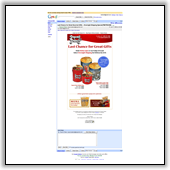 Gmail |
 Microsoft Outlook 2007 |  Windows Mail |
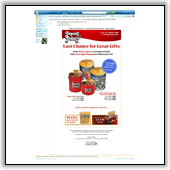 Hotmail | 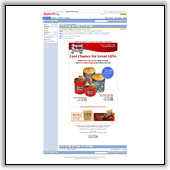 Yahoo! Mail |
 Mozilla Thunderbird | |
Click <A HREF="http://x.jngo1.net/w.z?***uniqueid****">here</a> to view this e-mail as a web page.


